

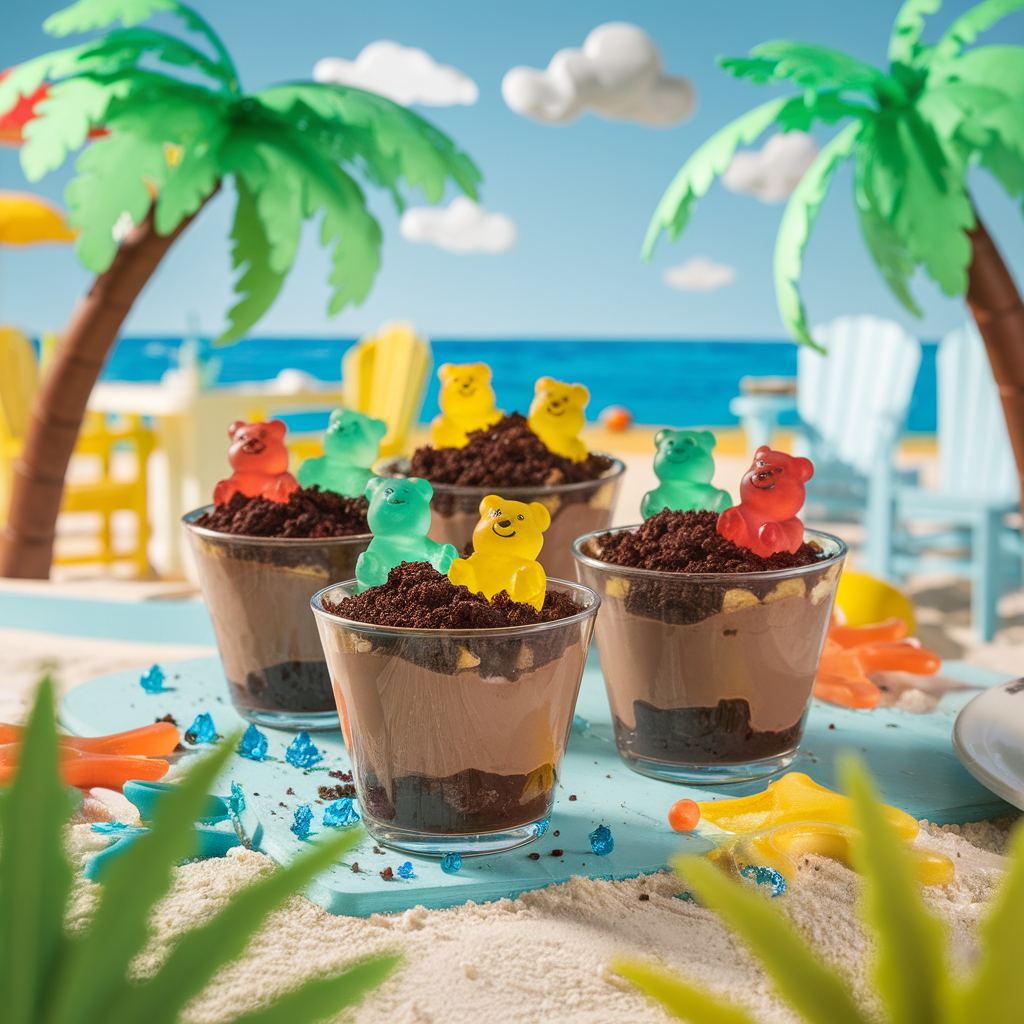
Summer is a time for sunshine, sandy beaches, and endless fun — especially for kids. When planning activities or treats for little ones, the best recipes are those that combine taste, creativity, and ease. Enter the beloved Beach Bear Dirt Cups, a charming and imaginative twist on the classic dirt pudding cups that delight children of all ages.
Whether you’re organizing a beach-themed party, seeking refreshing beach snacks, or looking for engaging food activities to keep kids entertained during the warm months, this recipe fits perfectly. These delightful pudding cups are not only delicious but also visually captivating, making them an excellent choice for any kid dessert or kids treat occasion.
What Are Dirt Pudding Cups and Why Are They So Popular?
Before diving into the specifics of the Beach Bear Dirt Cups, it’s helpful to understand the foundation — the classic dirt pudding. Originating as a fun, easy dessert, dirt pudding traditionally consists of chocolate pudding layered with crushed chocolate cookies (often Oreos) to mimic the look of soil or dirt. Gummy worms are often added to complete the “dirt” illusion, making it a hit among children who love a bit of whimsy in their food.
These simple desserts have endured in popularity because they:
- Are easy to prepare with just a few ingredients.
- Allow for endless creativity in presentation.
- Provide a playful eating experience.
- Appeal to children’s love of sweets and storytelling.
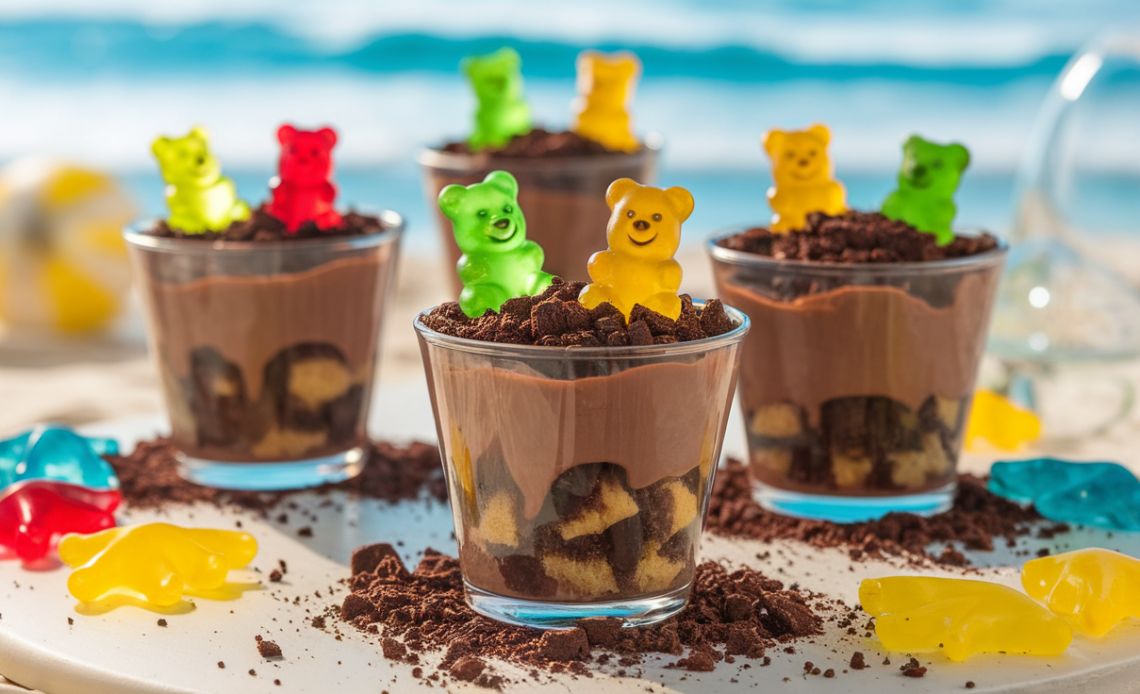
The Beach Bear Dirt Cups build on this concept by replacing gummy worms with gummy bears and adding a beach theme, transforming the dessert into a miniature beach scene right in a cup.
The Inspiration Behind Beach Bear Dirt Cups
The idea of turning dirt pudding cups into a beach snack stems from wanting to bring a fun summer vibe to classic treats. Kids naturally associate gummy bears with friendly creatures, so they become adorable “beach bears” playing in the sand — which is cleverly represented by cookie crumbs.
Adding this thematic layer turns a simple pudding cup into a multi-sensory experience that sparks imagination. It’s a perfect blend of taste, texture, and story that kids will remember and ask for again.
Ingredients Breakdown: The Building Blocks of Your Beach Bear Dirt Cups
Chocolate Pudding Mix
The star of the dish, chocolate pudding is creamy, rich, and provides the “mud” or “water” base of the dessert. Using instant pudding mix saves time, but homemade pudding can add a gourmet touch if desired.
Crushed Oreos or Chocolate Sandwich Cookies
The cookie crumbs simulate “dirt” or “sand,” providing a crunchy texture that contrasts perfectly with the smooth pudding. The visual effect of black-and-white crumbs resembles wet sand or dark soil.
Gummy Bears
These cute, chewy candies are the “beach bears” frolicking in your cups. Choose classic fruit-flavored gummy bears for colorful pops that catch kids’ eyes.
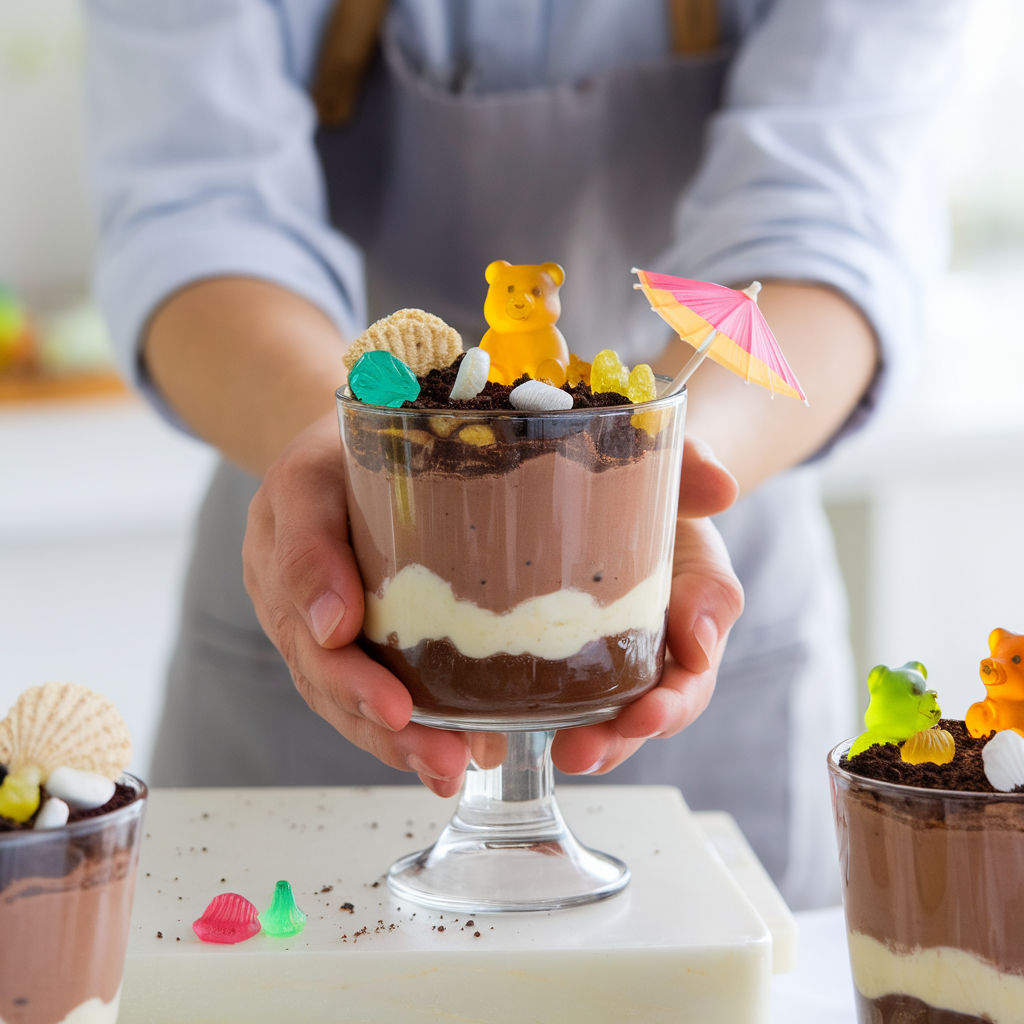
Whipped Cream (Optional)
Adding whipped cream can mimic sea foam or clouds and adds a light, airy texture to the dessert.
Optional Decorative Toppings
To enhance the beach theme, consider edible decorations such as:
- Mini chocolate chips (representing small rocks or seashells)
- Blue-colored shredded coconut (for water)
- White chocolate “shells” (made by molding melted white chocolate)
- Tiny umbrella picks or paper flags
Detailed Step-By-Step Guide to Making Beach Bear Dirt Cups
Step 1: Prepare the Chocolate Pudding
Prepare the pudding according to package directions. Use cold milk and whisk the mixture until it thickens to a creamy consistency. Homemade pudding can be made by heating milk with cocoa powder, sugar, and cornstarch until thickened, then cooling before assembly.
Step 2: Crush the Cookies
Put the Oreos or chocolate cookies in a zip-top bag and crush them finely with a rolling pin or pulse them in a food processor. The finer the crumbs, the more realistic the “dirt” texture.
Step 3: Assemble the Layers
- Add 2–3 tablespoons of pudding to the bottom of each cup.
- Add a generous spoonful of crushed cookie crumbs on top of the pudding.
- Repeat these layers until the cup is nearly full, finishing with a layer of cookie crumbs.
Step 4: Decorate the “Beach”
- Place several gummy bears on the top to create a scene of beach bears.
- Add whipped cream around the bears to simulate sea foam or clouds.
- Sprinkle mini chocolate chips or coconut flakes for extra texture.
- Optionally, use a toothpick or skewer to arrange the gummy bears in “play” positions.
Step 5: Chill and Serve
Cover the cups with plastic wrap or lids and refrigerate for at least 30 minutes. Serve cold for the best texture and taste.

Why This Recipe is Ideal for Summer Fun for Kids
Easy Preparation Keeps Things Cool
Summers in many regions are hot and humid, making oven baking impractical. These pudding cups require no baking, minimal prep, and little cleanup, keeping the kitchen cool and spirits high.
Hands-On Food Activities
Kids love getting involved in cooking, and this recipe encourages them to participate safely — crushing cookies, spooning pudding, and arranging gummy bears. It’s a perfect food activity that combines creativity with skill development.
Portable and Perfect for Outdoor Eating
Pack these beach snacks for picnics, pool parties, or day trips to the beach. The cups are spill-resistant and can be served with spoons, minimizing mess.
Perfect Portion Control
Individual servings mean kids get the right amount of dessert without overindulging, making it easier to monitor sugar intake.
Fun Variations to Customize Your Beach Bear Dirt Cups
Tropical Beach Bear Cups
Add shredded coconut dyed blue to create an ocean effect. Layer blue Jell-O beneath the pudding to mimic water, then top with cookie crumbs as “sand.”
Fruity Dirt Pudding Cups
Add a layer of mashed strawberries or banana slices between the pudding and cookie crumbs to add natural sweetness and nutrients.
Monster Beach Bears
Swap gummy bears for gummy sharks or sea creatures to create a “beach monster” theme.
Allergy-Friendly Cups
Use gluten-free cookies and fruit-based gummy candies to accommodate dietary needs.
Creative Food Activities to Engage Kids with Dirt Pudding Cups
DIY Dessert Bar
Set up a dessert station with all ingredients laid out so children can create their own dirt pudding cups. Provide clear instructions and fun props to inspire creativity.
Storytelling and Snacking
Tell a fun beach story or sing songs about summer while kids make and enjoy their cups, reinforcing the theme and making the experience memorable.
Sensory Exploration
Discuss the textures and tastes — the creaminess of pudding, the crunch of crumbs, the chewiness of gummies — helping kids develop sensory awareness.
Science Meets Cooking
Explain layering as a simple science concept — how different densities keep layers separate, or how textures change in the fridge.
Serving Suggestions for Parties and Events
Presentation Ideas
Serve the cups in clear glasses or small mason jars to showcase layers. Decorate with miniature beach umbrellas or themed stickers on the cups.
Pairing With Other Beach Snacks
Serve alongside fresh fruit kebabs, homemade trail mix with tropical flavors, or chilled lemonade for a full beach party spread.
Themed Table Settings
Use beach towels or sand buckets as part of your table decor to complete the immersive experience.
Healthier Kid Desserts: Making Dirt Pudding Cups Nutritious
While these cups are undeniably sweet, here are ways to add nutritional value:
- Use low-fat or no-sugar-added pudding options.
- Add fresh fruit layers rich in vitamins and fiber.
- Incorporate yogurt instead of pudding for probiotics and protein.
- Choose natural fruit gummies with no artificial dyes.
- Sprinkle nuts or seeds (if no allergies) for healthy fats and crunch.
Storage and Leftover Tips
- Store dirt pudding cups covered in the refrigerator for up to 2 days.
- The cookie crumbs may soften slightly overnight, but the flavor remains delicious.
- Leftovers can be stirred together and enjoyed as a pudding dessert.
Why Kids Love Pudding Cups and Why They’re Great for Parents
From a child’s perspective, these cups are fun, colorful, and tasty. The combination of textures and the surprise of gummy bears hidden on top keeps them excited.
For parents, the cups are:
- Easy to make and portion-controlled.
- Inexpensive, requiring common ingredients.
- Mess-minimizing with individual containers.
- Great for teaching simple cooking skills.
Fun Facts About Dirt Pudding Cups and Related Desserts
- Dirt pudding was popularized in the 1970s as a kid-friendly party dessert.
- The use of gummy worms in dirt pudding taps into children’s love of creepy-crawly creatures.
- Many variations have emerged, including themed cups like dinosaur dirt cups, Halloween graveyard pudding cups, and now, beach bear dirt cups.
- These desserts are often used in schools for food activities to encourage healthy social interaction around food.
Frequently Asked Questions (FAQs)
Q: Can I freeze Beach Bear Dirt Cups?
A: It’s not recommended as freezing pudding changes its texture, making it watery upon thawing.
Q: Are gummy bears safe for toddlers?
A: Gummy bears can be a choking hazard for children under 3, so supervise accordingly or choose softer candies.
Q: Can I make pudding from scratch?
A: Yes! Mix cocoa powder, sugar, milk, cornstarch, and vanilla, then cook over medium heat until thickened for a homemade pudding alternative.
Final Thoughts: Why Beach Bear Dirt Cups Should Be Your Go-To Summer Treat
These dirt pudding cups combine nostalgia, creativity, and summer vibes into one fun dessert. Easy to make, customizable, and loved by kids, they’re the perfect theme snack for any occasion. Whether you’re hosting a pool party, planning a school activity, or just looking for a delightful kids treat to cool down on a hot day, Beach Bear Dirt Cups will never disappoint.
So gather your ingredients, get the kids involved, and enjoy the sweet taste of summer fun — one delicious cup at a time!


