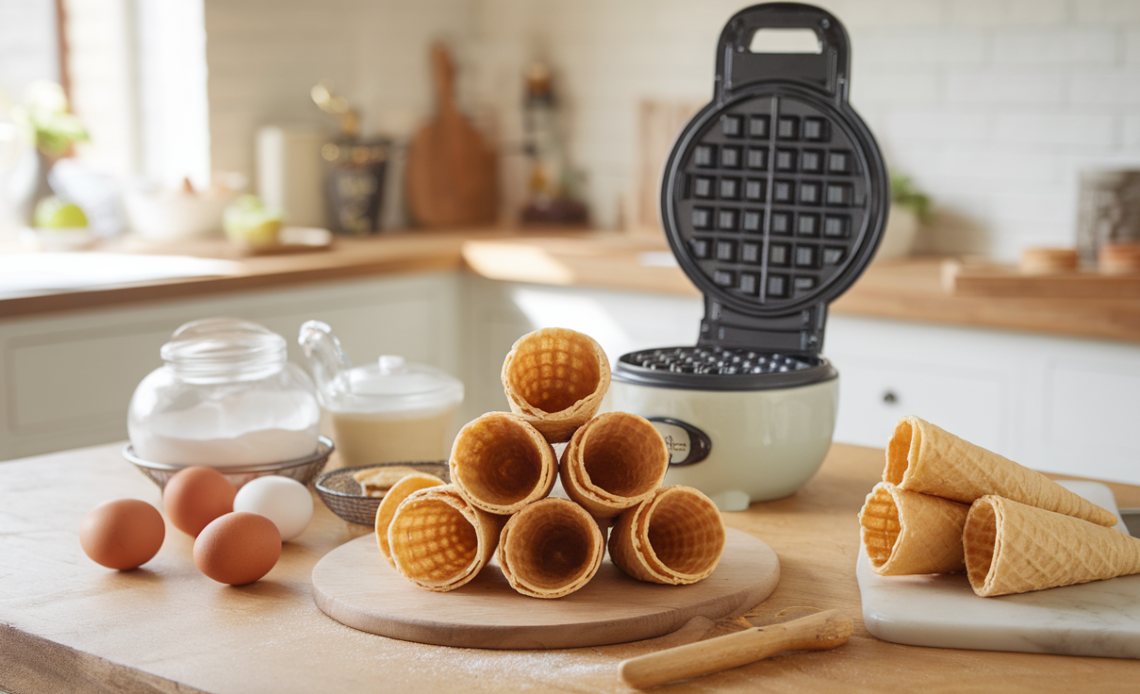
There’s something incredibly satisfying about enjoying a scoop of ice cream in a freshly made waffle cone. The crunchy, warm cone perfectly complements the creamy, chilled ice cream, making for a classic and indulgent treat. But instead of relying on store-bought cones, why not make them at home? By making your own waffle cones, you can customize the flavor, texture, and even the shape of the cones. Whether you’re an ice cream lover or just looking for a fun kitchen project, learning how to make waffle cones is a great way to impress your friends and family. In this article, we will guide you through the entire process of making homemade waffle cones, including how to use a waffle cone maker, tips for perfecting the texture, and fun variations to try. Let’s dive into the world of homemade waffle cones!
Why Make Homemade Waffle Cones?
Before we delve into the actual recipe and techniques, let’s take a moment to discuss why you should bother making waffle cones at home instead of just buying them at the store. Here are several compelling reasons to make homemade waffle cones:
1. Freshness and Texture
Homemade waffle cones are unbeatable in terms of freshness. When you make them yourself, you get to enjoy the deliciously crispy texture and flavor that store-bought cones can’t replicate. When you eat a fresh waffle cone, you’ll notice how much crisper and more flavorful it is compared to a pre-packaged cone, which often loses its crunch over time.
2. Customization
Making waffle cones at home allows you to add your personal touch. You can experiment with different flavors, toppings, and even colors, making them perfect for any occasion, from birthdays to holidays or just a cozy family night. You can make chocolate waffle cones, add spices like cinnamon, or even create rainbow-colored cones that will wow your guests.
3. Satisfaction
There’s a deep sense of satisfaction that comes with making your own waffle cones. Not only are they a fun and rewarding kitchen project, but they also give you the chance to show off your culinary skills. Whether you’re serving them with a delicious homemade ice cream flavor or sharing them at a party, the effort you put into making the cones from scratch will definitely impress.
4. Better Control Over Ingredients
When you make your own waffle cones, you get complete control over the ingredients you use. This means you can avoid unnecessary preservatives, artificial colors, or flavors that might be found in some store-bought cones. By using simple and fresh ingredients, you can ensure the highest quality for your cones.

Ingredients for Homemade Waffle Cones
Now that we’ve established the benefits of making your own waffle cones, let’s go over the ingredients needed to make them. The ingredients are simple and common, and you likely have most of them in your kitchen already. Here’s what you’ll need:
For the Waffle Cone Batter:
- 1 cup all-purpose flour – The base of the cone, providing structure.
- 1/2 cup sugar – Adds sweetness and helps with the crispiness of the cone.
- 1/2 teaspoon vanilla extract (or any flavor extract of your choice) – For a burst of flavor.
- 1/4 teaspoon salt – To balance out the sweetness.
- 2 large eggs – Eggs help with the batter’s structure and texture.
- 1/4 cup unsalted butter, melted – Adds richness and flavor to the cones.
- 1/4 cup milk – To provide moisture and create the right batter consistency.
- 1/4 teaspoon baking powder (optional for extra fluffiness) – Helps to create a lighter texture in the cone.
For Optional Decoration:
- Chocolate chips, sprinkles, or crushed nuts – These can be used to coat the inside or outside of your waffle cones for an extra treat.
These ingredients combine to create a light, crispy, and flavorful batter perfect for homemade waffle cones.
Step-by-Step Guide: How to Make Waffle Cones
Step 1: Preheat the Waffle Cone Maker
The first step is to get your waffle cone maker ready. If you have a waffle cone maker, it will make the process much easier and quicker. Preheat the waffle cone maker according to the manufacturer’s instructions. A waffle cone maker is designed to give you the perfect waffle cone texture, but if you don’t have one, you can use a regular waffle iron or even a flat skillet. Just be prepared for a slightly different outcome, as making them on a skillet will require a bit more attention to detail.
Step 2: Prepare the Waffle Cone Batter
While your waffle cone maker is heating up, start preparing the batter. In a large mixing bowl, combine all your dry ingredients: flour, sugar, salt, and baking powder (if you’re using it). Mix them together. Next, add the wet ingredients: eggs, milk, melted butter, and vanilla extract. Whisk everything together until you have a smooth and lump-free batter. The batter should have a thick but spreadable consistency, similar to pancake batter.
Step 3: Cook the Waffle Cones
Once the waffle cone maker is fully preheated, it’s time to cook the cones! Scoop a small amount of the batter onto the center of the waffle cone maker. Close the lid and cook the batter for 2-3 minutes, or until the cone is golden brown and crispy. If you’re using a regular waffle iron, the process will be similar, but you may need to adjust the time depending on your waffle iron’s heat settings. It’s essential to ensure the cone is cooked through and crispy.
If you don’t have a waffle cone maker, you can use a skillet to cook the batter in thin layers, but this requires a little more effort and precision. Cook the waffle until it is golden and crispy on both sides.
Step 4: Shape the Waffle Cones
Once the waffle has cooked, you must quickly shape it into a cone while it’s still hot. You’ll need to act fast because the waffle will start to soften and cool down, making it harder to shape. Carefully remove the waffle from the maker and immediately roll it into a cone shape, either by hand or using a cone mold. Hold the cone shape for a few seconds to allow it to set. If you’re using a waffle iron, you can gently press the edges of the cone together to help it hold its shape.
Step 5: Let the Cones Cool
Allow the shaped waffle cones to cool completely. This step is crucial because it allows the cones to harden and become crisp. Once cooled, your homemade waffle cones will be ready to hold your favorite ice cream!

Step 6: Optional Decorations
If you want to take your waffle cones to the next level, you can decorate them. One of the most popular ways to do this is by dipping the rims of the cones in melted chocolate. After dipping, you can roll them in toppings like crushed nuts, chocolate chips, or colorful sprinkles. Allow the chocolate to harden before filling the cones with ice cream.
Using a Waffle Cone Maker
If you plan on making waffle cones often, investing in a waffle cone maker can make the process much easier. These specialized devices are designed to make waffle cones with the perfect texture, crispness, and shape. Here are a few tips for using a waffle cone maker:
- Preheat the Maker: Be sure to preheat your waffle cone maker so that the cones cook evenly and get that perfect golden brown color.
- Don’t Overfill: Use just enough batter to cover the cooking surface without spilling over. This ensures that the cones cook evenly and are the right size.
- Work Quickly: After the waffle cone is cooked, you must roll it into a cone shape quickly while it’s still warm and pliable.
If you don’t have a waffle cone maker, you can also use a regular waffle iron or even a skillet to make your cones. While the results may not be as perfect, it’s still a fun and satisfying way to make waffle cones at home.
Variations for Your Homemade Waffle Cones
Once you’ve mastered the basic waffle cone recipe, it’s time to get creative and try out some variations! Here are some fun ideas to personalize your cones:
1. Flavored Waffle Cones:
You can easily flavor your waffle cones by adding extracts, spices, or cocoa powder to the batter. Try some of these delicious flavors:
- Chocolate Waffle Cones: Add 2 tablespoons of cocoa powder to the batter for a rich, chocolatey cone.
- Cinnamon Waffle Cones: Mix in 1/2 teaspoon of ground cinnamon for a warm and comforting flavor.
- Lemon Waffle Cones: Add 1 teaspoon of lemon zest for a refreshing citrus twist.
2. Colorful Waffle Cones:
Add a fun pop of color to your waffle cones by mixing in some food coloring. This works especially well for parties or festive occasions. Just add a few drops of food coloring to the batter and mix until you achieve the desired color. You can even create rainbow cones by dividing the batter into different colors and layering them.

3. Chocolate-Dipped Waffle Cones:
Dipping your waffle cones in chocolate is an excellent way to add extra flavor and richness. Melt some chocolate and dip the top of the cone in it. You can also roll the dipped cones in toppings like crushed nuts, mini marshmallows, or sprinkles. This adds an extra touch of indulgence to your cones.
4. Mini Waffle Cones:
For a fun party treat, make mini waffle cones by using less batter and cooking smaller waffles. These tiny cones are perfect for serving at a party, allowing guests to try different flavors of ice cream without committing to a full-size cone.
How to Use Your Homemade Waffle Cones
Now that you’ve perfected the art of making waffle cones, it’s time to use them! Here are a few tips for filling your homemade waffle cones:
- Fill Immediately: To enjoy the freshest waffle cones, fill them with ice cream right after they’ve cooled. If you wait too long, the cones may soften or lose their crispiness.
- Toppings Galore: Top your ice cream with chocolate sauce, whipped cream, fruit, nuts, or candy to create a custom cone that is as decadent as it is delicious.
- Perfect for Parties: Waffle cones are a fantastic treat for parties. Set up an ice cream bar with a variety of ice cream flavors and toppings so that guests can create their own custom cones.
Storing Homemade Waffle Cones
If you’ve made more waffle cones than you can eat, don’t worry! You can store your homemade cones for later use. Here’s how:
- Airtight Storage: To prevent your cones from getting stale, store them in an airtight container at room temperature. They’ll stay fresh for up to a week.
- Freezing: If you want to keep them longer, freeze the cones. Place them in a freezer-safe bag or container, and they’ll last up to 2 months.
Conclusion
Making homemade waffle cones is a fun, rewarding, and delicious way to enjoy your favorite frozen treats. Not only are you able to customize the cones to your taste, but you’ll also experience the joy of creating them from scratch. Whether you use a waffle cone maker or a traditional waffle iron, following these simple steps will help you achieve the perfect waffle cone every time. Don’t forget to experiment with different flavors and decorations to make your cones even more special. So, next time you’re craving ice cream, skip the store-bought cones and treat yourself to the ultimate homemade waffle cones experience!


