

There’s something magical about the aroma of freshly baked bread filling your home. The soft, warm, and fluffy texture combined with a savory flavor can elevate any meal or simply stand alone as a perfect snack. If you’ve ever dreamed of making your own homemade rustic bread but were intimidated by the need to knead dough for hours, then this Rustic No-Knead Rosemary Garlic Bread recipe is your answer.
This recipe takes the stress out of bread-making and allows you to bake an artisan-quality loaf with minimal effort. Packed with the aromatic flavors of fresh rosemary and garlic, this no-knead bread is perfect for every occasion. Whether you’re serving it as a side with dinner or enjoying it as a standalone snack, this bread is sure to impress your family and guests.
In this article, we’ll dive deep into how to make Rosemary Garlic Bread from scratch, using simple ingredients and a technique that makes this process quick and effortless. You’ll learn about the various techniques for making bread no knead and why Dutch oven bread is such a game-changer. Plus, we’ll discuss how this oven bread recipe can be a fantastic addition to your collection of savory breads and even biscuit bread variations.
Let’s get started!
The Magic of No-Knead Bread
Before diving into the recipe, let’s talk about the magic of no-knead bread. Traditionally, bread-making required a lot of physical effort—kneading dough for 10-15 minutes to develop the gluten, waiting for multiple rises, and carefully monitoring the dough’s progress. However, the no-knead technique has revolutionized bread-making for many home bakers.
No-knead bread allows the dough to rise slowly, using time instead of effort to develop the texture and flavor. This method is ideal for those who are short on time or simply prefer a hassle-free approach to baking bread. By mixing the ingredients together and allowing the dough to rest for 12-18 hours, you create a flavorful, rustic loaf without breaking a sweat.
This approach works because, during the long resting period, the dough ferments, allowing the yeast to slowly do its job. Over time, the dough develops a complex, rich flavor while also achieving a light and airy crumb. The result? Rustic artisan bread that’s as close to perfection as you can get without spending hours in the kitchen.
Why Rosemary and Garlic?
Rosemary garlic bread is a delightful twist on the classic, thanks to the bold flavors of garlic and rosemary. These ingredients complement each other beautifully, with the savory, earthy notes of rosemary balancing out the rich, aromatic qualities of garlic. Whether fresh or dried, rosemary adds a delightful herbal fragrance to the bread, while garlic infuses the dough with warmth and depth.
Garlic is not just flavorful; it’s also packed with health benefits. It’s known for its immune-boosting properties and its ability to promote heart health. Combining these two ingredients in a rustic bread recipe makes for a savory treat that’s not only delicious but beneficial too.
The rosemary also works as an antimicrobial agent, and it has been known to promote digestion and improve memory. If you’ve ever tasted rosemary before, you’ll know that its fragrant flavor instantly elevates any dish, and this is especially true when combined with garlic in this bread recipe.
Ingredients for Rustic No-Knead Rosemary Garlic Bread
To make this homemade rustic bread, you’ll need just a few basic ingredients that are likely already in your pantry. Here’s what you’ll need:
- 3 cups all-purpose flour (or bread flour for a slightly chewier texture)
- 1 ½ teaspoons salt
- ½ teaspoon active dry yeast
- 1 tablespoon fresh rosemary (or 1 teaspoon dried rosemary)
- 3 cloves garlic, finely chopped or minced
- 1 ½ cups warm water (around 110°F)
- 1 tablespoon olive oil
- A little extra flour for dusting
Tools You’ll Need
This no-knead bread recipe is designed to be simple, so there are only a few tools needed:
- A large mixing bowl for combining the ingredients
- A wooden spoon or spatula for stirring the dough
- A clean kitchen towel to cover the dough as it rises
- A Dutch oven or heavy pot with a lid (this is essential for Dutch oven bread, which will give the bread its signature crispy crust)
- A parchment paper sheet for easy bread transfer to the oven
How to Make Rustic No-Knead Rosemary Garlic Bread
Now that you have all your ingredients and tools ready, let’s get started with making this easy, rustic bread. Here’s a step-by-step guide:
Step 1: Combine the Dry Ingredients
In a large mixing bowl, combine the flour, salt, yeast, rosemary, and garlic. Stir the mixture together until evenly distributed. The combination of rosemary and garlic in the dry ingredients ensures that the flavors are well-spread throughout the bread.
At this stage, you’ll notice the rich aroma of rosemary filling your kitchen, and the tiny garlic pieces will add a slight fragrance that promises to enhance the bread as it bakes.
Step 2: Add the Wet Ingredients
Create a well in the center of the dry ingredients and add the warm water and olive oil. Stir with a wooden spoon or spatula until the dough starts to come together. You don’t need to worry about kneading here, just make sure all the flour is hydrated. The dough should be a bit sticky, but don’t add more flour—this will help create a tender, moist texture in the final bread.
You’ll notice the dough might feel a bit loose or sticky at first, but this is perfectly fine. The long fermentation time will allow the dough to develop its structure without the need for physical kneading. The olive oil adds richness and flavor to the bread, while also contributing to the soft, tender crumb.
Step 3: Let the Dough Rest
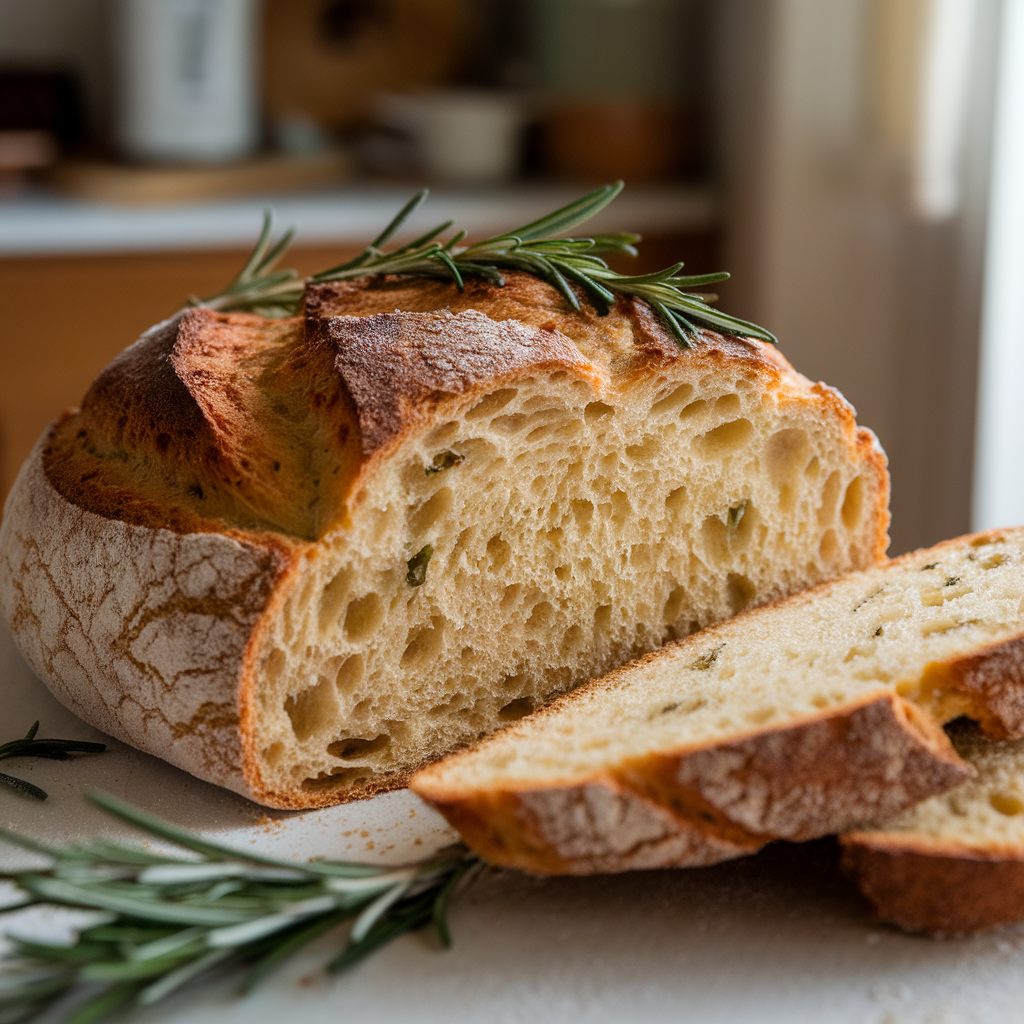
Cover the bowl with a clean kitchen towel and let the dough rise for 12-18 hours at room temperature. During this time, the yeast will work its magic, and the dough will double in size, forming bubbles and a rough, rustic texture. This long fermentation process is what gives the bread its deep flavor and airy, open crumb.
Don’t rush this step. Let the dough rise slowly so that it develops its characteristic flavor and texture. The longer the dough sits, the more pronounced the taste will become. By the end of this resting period, you’ll notice that the dough has a slightly bubbly, airy texture—this means it’s ready for baking.
Step 4: Shape the Dough
Once the dough has risen, turn it out onto a floured surface. Gently shape it into a ball, being careful not to deflate it too much. This is where the biscuit bread texture comes into play—by handling the dough gently, you’re preserving the bubbles that form in the dough during the rise.
You don’t need to be too precise with the shaping—this is rustic bread, after all! The goal is to keep it as airy as possible while making sure it holds its shape for baking.
Step 5: Preheat the Oven and Dutch Oven
Place a Dutch oven (or any heavy pot with a lid) into the oven and preheat it to 450°F (230°C). Preheating the pot allows the bread to bake in a hot environment, which gives it a nice, crispy crust.
Using a Dutch oven is essential for getting that perfect crust. The heavy pot traps heat and moisture, creating a mini-oven effect that simulates the steam-baking environment found in professional bakeries. This method is one of the key secrets to achieving the crisp, golden-brown crust that is characteristic of oven bread.
Step 6: Bake the Bread
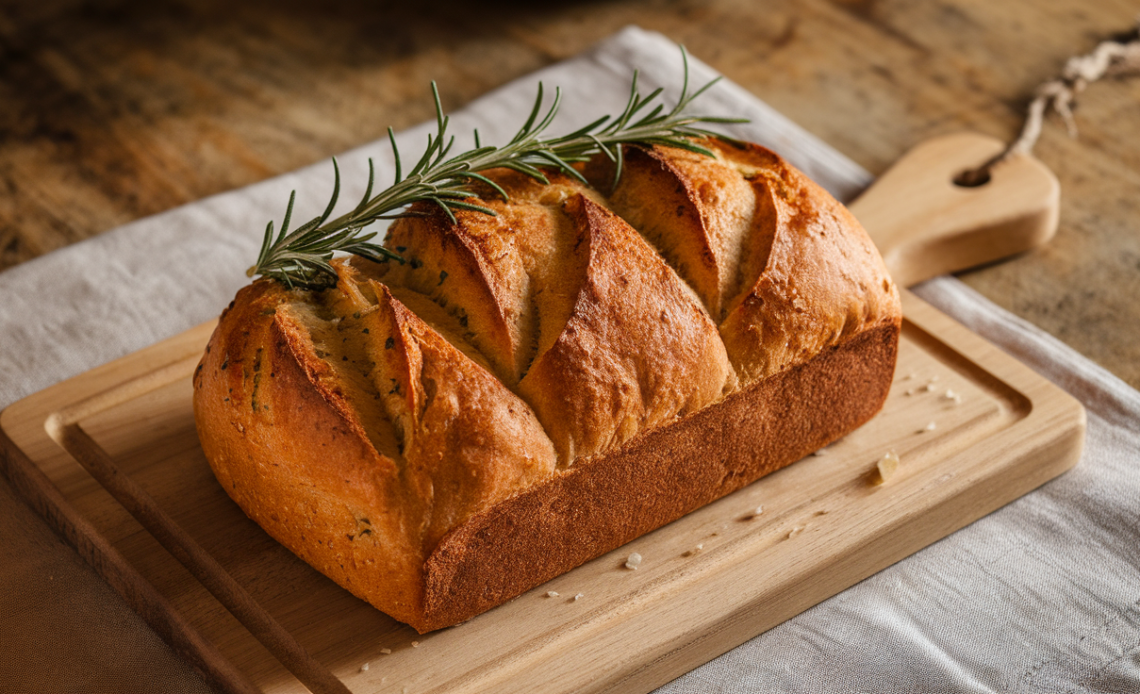
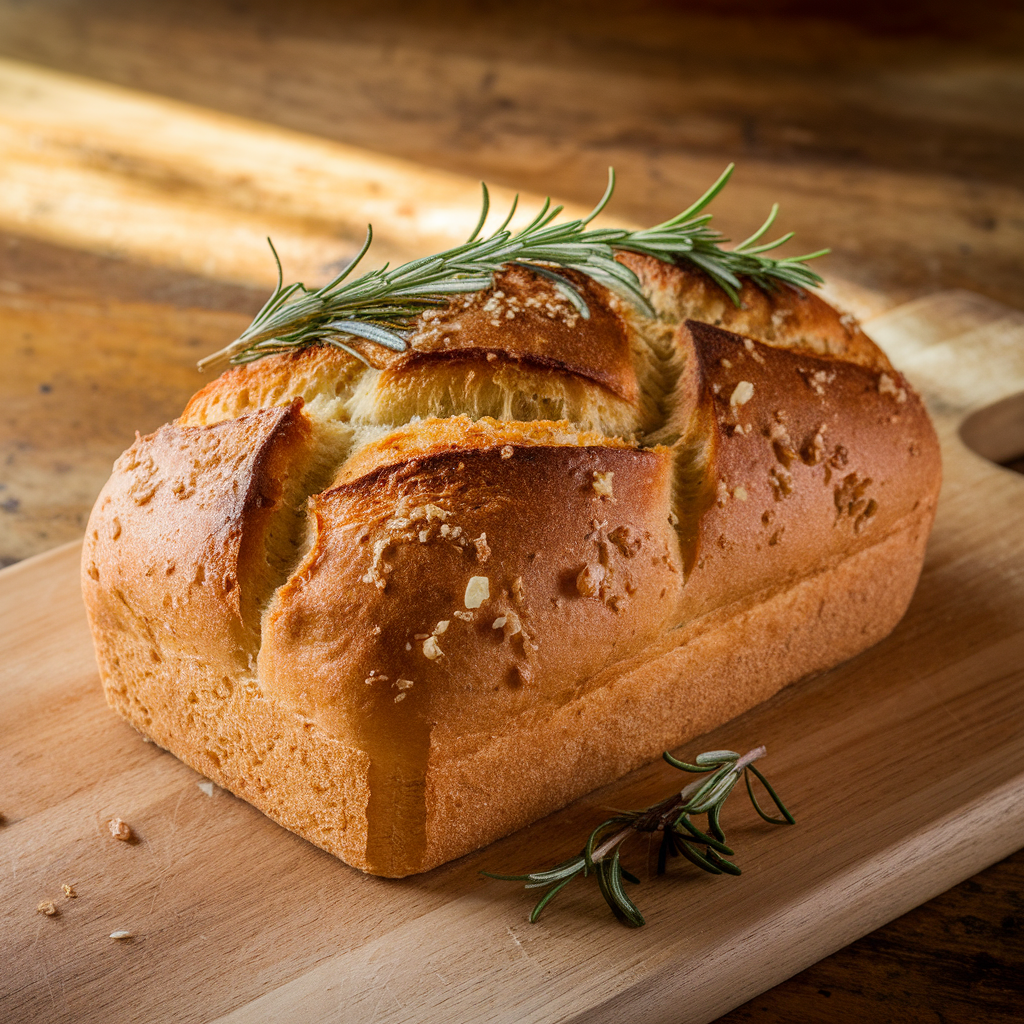
Carefully transfer the shaped dough into the preheated Dutch oven, placing it on a piece of parchment paper to make it easier to lift. Cover the pot with the lid and bake the bread for 30 minutes. Then, remove the lid and bake for an additional 15-20 minutes to get a golden, crispy crust. The bread should sound hollow when tapped on the bottom, indicating that it’s fully cooked.
The Dutch oven bread technique ensures that the bread bakes evenly, creating that ideal balance of a crispy crust and soft, airy interior. The steam that’s trapped inside the Dutch oven will create a beautiful, blistered crust that will make your rosemary garlic bread look as stunning as it tastes.
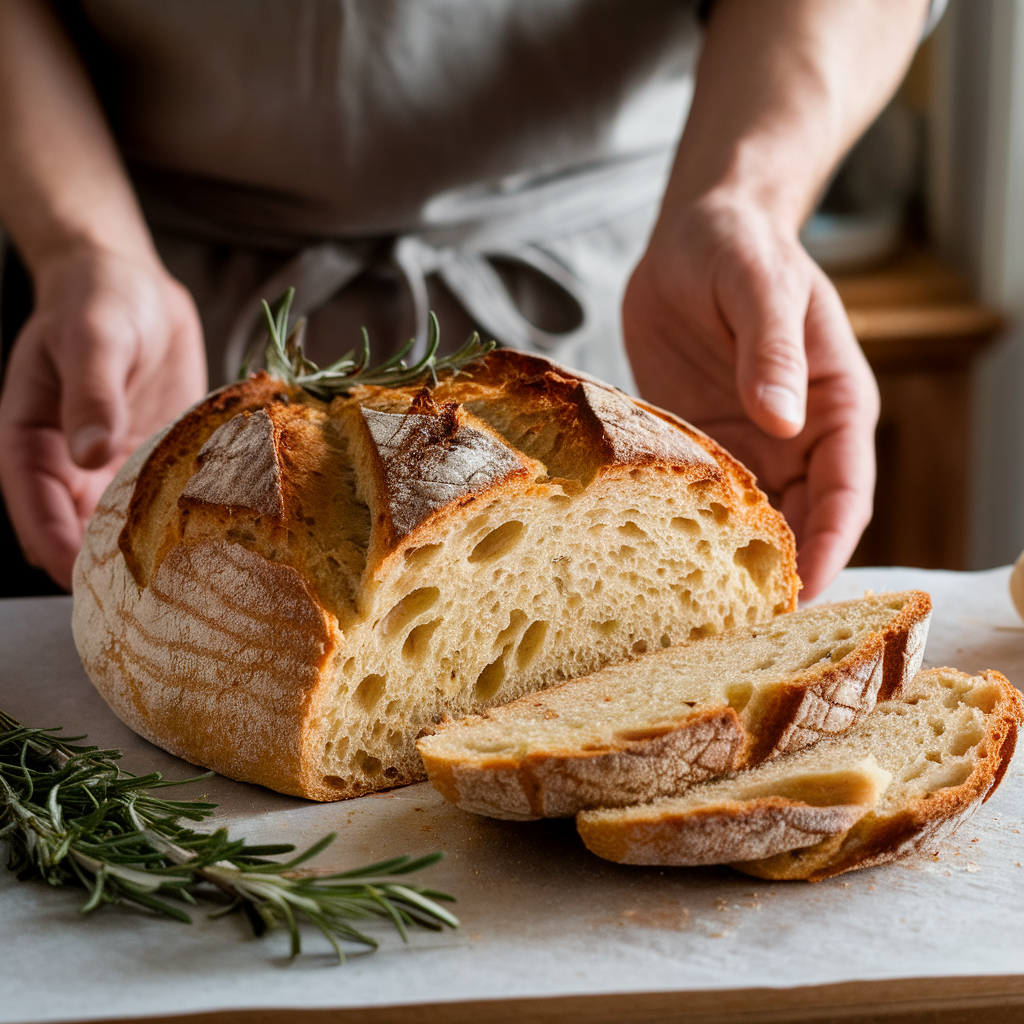
Step 7: Cool and Serve
Remove the bread from the Dutch oven and let it cool on a wire rack for at least 20 minutes before slicing. This waiting period is crucial because it allows the bread to finish cooking and settle. Once it has cooled slightly, slice it and enjoy the delicious, aromatic rosemary garlic bread.
The texture of this bread is heavenly—crispy on the outside with a soft, chewy interior. The garlic and rosemary flavors will have permeated the bread, giving each bite an incredible depth of flavor.
Tips for Success
- Flour Variations: If you prefer a more rustic texture, feel free to mix in some whole wheat flour. Start by substituting 1 cup of all-purpose flour with whole wheat flour for a hearty loaf. You can also experiment with other flours like spelt or rye for different flavors and textures.
- Rosemary Variations: If you love a stronger rosemary flavor, feel free to add more rosemary to the dough or sprinkle some on top before baking. Fresh rosemary will give a more vibrant flavor, while dried rosemary adds a more subtle touch.
- Garlic Options: For an even richer garlic flavor, consider roasting the garlic before adding it to the dough. Roasted garlic has a milder, sweeter flavor that will meld beautifully with the rosemary. You can also add a pinch of garlic powder for extra flavor.
- Storage: To keep your rustic bread fresh, store it in a bread box or wrap it in a clean kitchen towel. Avoid sealing it in a plastic bag as this can make the crust soft. It’s best enjoyed within 3 days of baking, but it can be frozen for up to 3 months.
Serving Suggestions for Rosemary Garlic Bread
This savory bread is incredibly versatile and pairs well with a variety of dishes. Here are some ideas on how to serve it:
- As a Side Dish: Serve this bread alongside a hearty soup or salad. Its savory flavor makes it the perfect accompaniment to a bowl of tomato soup, creamy potato soup, or a rich pasta dish. You can also pair it with roasted meats like chicken or lamb for a complete meal.
- With Dips: Slice the bread into thick pieces and serve it with your favorite dips like hummus, tzatziki, or olive tapenade. The garlic and rosemary enhance the flavor of the dips, creating a flavor explosion with each bite.
- For Sandwiches: Use this artisan bread as the base for a delicious sandwich. Whether it’s a classic BLT, turkey, or veggie sandwich, the rosemary garlic bread adds an extra layer of flavor. You can also make a toasted sandwich, which will further highlight the crispy, aromatic crust.
Conclusion
If you’ve ever been intimidated by the thought of baking your own bread, this Rustic No-Knead Rosemary Garlic Bread will change your mind. It’s simple, flavorful, and requires very little effort. With its tender crumb, crispy crust, and aromatic rosemary and garlic flavor, this bread is a true delight. Whether you’re a beginner baker or an experienced pro, you’ll find that this bread no knead recipe is a game-changer.
So, next time you’re craving fresh bread, skip the store-bought options and try this easy, homemade Dutch oven bread recipe. It’s a satisfying and rewarding experience that will leave you with a loaf of rustic, flavorful bread to enjoy with family and friends. Happy baking!


